Imagine having a boundless canvas for your digital world, where spreadsheets stretch across an entire wall or your creative projects expand to cinematic proportions. In today’s fast-paced digital environment, expanding your workspace beyond a single screen is no longer a luxury but a powerful tool for productivity. While traditional monitors are the standard, your projector, typically reserved for movies or presentations, holds untapped potential as a dynamic second monitor. This guide will walk you through the simple steps to transform your projector into an extended desktop, boosting your multitasking capabilities and offering a truly immersive viewing experience.
The Power of Projectors as Second Monitors
Using a projector as a second monitor fundamentally changes your digital interaction. The most immediate benefit is the sheer scale it offers; imagine working on a document or browsing the web on a screen that can be dozens of inches or even several feet wide. This expansive view is not just for entertainment; it significantly enhances multitasking by providing ample space to arrange multiple applications, making comparisons easier and reducing the constant need to switch between windows.
For professionals, this means presenting a full-screen report while managing notes on your primary display, or for creatives, seeing your design work in a grander scale. Gamers and movie enthusiasts, naturally, will appreciate the immersive, cinematic feel a large projected display brings. Projectors also offer a level of portability that fixed monitors cannot, allowing you to set up a large display in various locations with relative ease.
However, it’s important to acknowledge certain considerations. Projectors often perform best in controlled lighting conditions, as ambient light can wash out the image. Resolution matching with your computer’s output is also crucial for optimal clarity, and the setup logistics might be slightly more involved than simply plugging in a standard monitor. Despite these minor challenges, the benefits of utilizing a projector for an extended display often outweigh the complexities, opening up new dimensions for work and play.
Essential Connections for Your Projector
Connecting your projector to your computer is the first crucial step in setting it up as a second monitor. Modern projectors and computers offer a variety of connection types, each with its own advantages. Understanding these will help you choose the best cable and any necessary adapters for your setup.
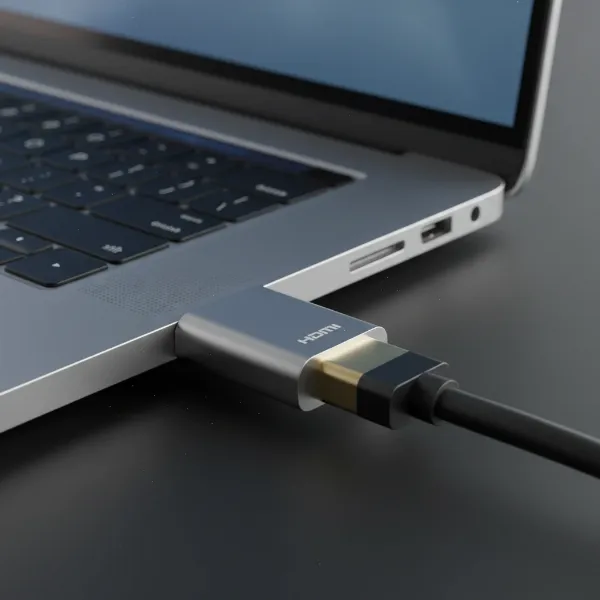
The most common and recommended connection type today is HDMI (High-Definition Multimedia Interface). HDMI cables transmit both high-quality video and audio signals digitally, providing a crisp, clear image and often simplifying your cable management. Most laptops and desktop computers, as well as nearly all modern projectors, feature HDMI ports.
Older systems or projectors might utilize VGA (Video Graphics Array). This analog connection is still functional for video transmission, though it doesn’t carry audio and typically offers a lower quality image compared to HDMI. You’ll recognize VGA by its distinctive 15-pin D-sub connector.
Other display outputs include DisplayPort and USB-C. DisplayPort is common on many newer computers and offers high bandwidth, supporting high resolutions and refresh rates. USB-C, especially with Thunderbolt 3 or 4 capabilities, is highly versatile, capable of carrying video, audio, data, and power over a single cable.
If the ports on your computer and projector don’t match, you’ll need an adapter. For example, many newer MacBooks use USB-C (Thunderbolt), so a USB-C to HDMI or USB-C to VGA adapter might be necessary to connect to a projector with older ports. Always ensure your adapter supports the resolution you intend to use for the best experience. Once you have the right cable or adapter, simply connect one end to your computer’s video output port and the other end to the corresponding input port on your projector.
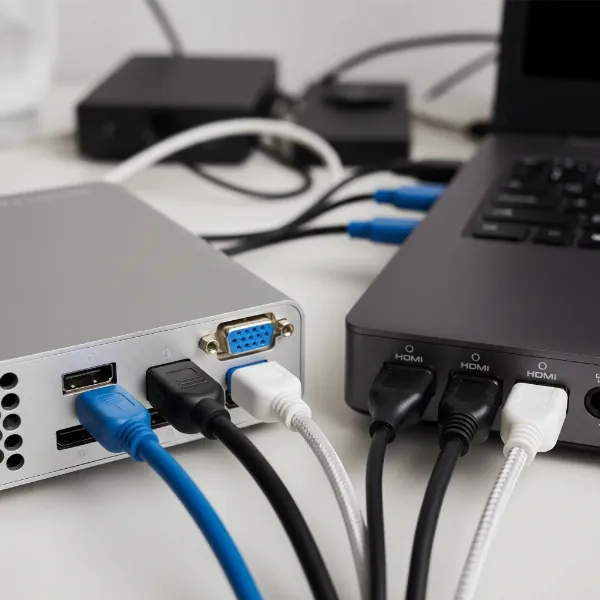 A close-up image showing various projector connection ports like HDMI, VGA, DisplayPort, and USB-C on a computer and projector, highlighting connectivity options.
Setting Up Your Projector as a Second Monitor on Windows
Configuring your projector as a second monitor on a Windows PC is a straightforward process, enabling you to extend your desktop and enhance your workspace. Here’s a step-by-step guide:
- Physical Connection: Begin by physically connecting your projector to your Windows computer. Use the appropriate cable, typically HDMI, VGA, or USB-C, based on the available ports on both devices. Ensure the connection is secure.
- Power On: Turn on your projector. Your Windows computer should automatically detect the new display. If it doesn’t, you might need to manually initiate detection, often by pressing the
Windows key + Pshortcut or going toSettings > System > Displayand clicking “Detect.” - Choose Display Mode: Press the
Windows key + Psimultaneously. This will open the “Project” menu on the right side of your screen, presenting four display options:- PC screen only: Uses only your primary computer screen.
- Duplicate: Mirrors your primary display onto the projector, showing the same content on both screens. This is great for presentations but not for an extended workspace.
- Extend: This is the option you want for using your projector as a second monitor. It expands your desktop across both screens, allowing you to drag windows and applications between them.
- Second screen only: Uses only the projector display, turning off your primary computer screen.
Select “Extend” to utilize your projector as a truly separate workspace.
- Optimize Display Settings: Once “Extend” is selected, you can further refine your display settings. Right-click anywhere on your desktop and select “Display settings.”
- Rearrange Displays: In the “Display” section, you’ll see graphical representations of your monitors (e.g., “1” and “2”). You can drag these to match the physical arrangement of your projector relative to your main screen, which dictates how your mouse cursor moves between them.
- Resolution & Scaling: For optimal clarity, it’s best to set the projector’s resolution to its native resolution. Select the projector display (e.g., “2”), then choose the recommended resolution from the “Display resolution” dropdown. You can also adjust “Scale and layout” to make text and apps larger or smaller if needed, but remember that scaling too much might impact clarity.
- Orientation: If your projector’s image appears upside down or sideways due to its mounting, you can adjust the “Display orientation” here.
- Audio Settings (Optional): If your projector has built-in speakers and you want to use them, go to
Settings > System > Soundand select your projector as the output device under “Choose your output device.”
With these steps, your Windows PC will seamlessly integrate your projector, providing you with an expanded desktop for increased productivity and immersive viewing.
Setting Up Your Projector as a Second Monitor on Mac
For Mac users, connecting and configuring a projector as an extended display is just as intuitive, integrating smoothly into the macOS environment. Here’s how to do it:
- Physical Connection: Connect your projector to your Mac. Many modern Macs feature Thunderbolt (USB-C) ports, so you might need a USB-C Digital AV Multiport Adapter (for HDMI) or a USB-C VGA Multiport Adapter to connect to older projectors. Ensure all cables and adapters are firmly connected.
- Power On: Switch on your projector. macOS is typically very good at detecting new displays automatically.
- Access Display Settings:
- For macOS Ventura or later: Go to
System Settings > Displays. - For macOS Monterey or earlier: Go to
Apple menu > System Preferences > Displays.
You will see your internal display and the newly detected projector listed.
- For macOS Ventura or later: Go to
- Configure Extended Display:
- Arrangement Tab (Older macOS): If you’re using an older macOS version, click on the “Arrangement” tab. Here, you’ll see blue rectangles representing your displays. To use the projector as an extended display, ensure the “Mirror Displays” checkbox is unchecked. You can then drag the projector’s blue rectangle to position it relative to your main display, controlling how your mouse moves between screens.
- Newer macOS (Ventura+): Under
System Settings > Displays, click on the projector’s name in the sidebar. You’ll typically see an option for “Use As” or simply “Arrange Displays.” Ensure it’s set to “Extend display” (or similar wording) rather than “Mirror for” your main screen. You can also drag the display icons in the “Arrangement” view to match your physical setup.
- Optimize Display Settings:
- Resolution: Select the projector display in the
Displayssettings. For the clearest image, choose its native resolution from the “Resolution” options. If you experience scaling issues, you can experiment with scaled resolutions. - Brightness & Contrast: While most adjustments will be on the projector itself, some Mac models allow basic display adjustments directly from
System Settings/Preferences. - Audio Output: If your projector has speakers, you might want to direct audio to it. Go to
System Settings > Sound > Output(orSystem Preferences > Sound > Output) and select your projector.
- Resolution: Select the projector display in the
By following these steps, your Mac will treat the projector as an additional workspace, providing you with a large, flexible display area for all your computing needs.
Optimizing Your Projector Display Settings
Once your projector is connected and functioning as a second monitor, fine-tuning its display settings is crucial for achieving the best possible image quality and user experience. A well-optimized projector ensures text is legible, colors are accurate, and your extended desktop is truly beneficial.
The most critical setting is Resolution Matching. Every projector has a “native resolution”—the actual number of pixels it can display. For the sharpest image, always try to match your computer’s output resolution to the projector’s native resolution. If your computer sends a resolution that doesn’t match, the projector will scale the image, which can lead to blurriness or pixelation. You can find your projector’s native resolution in its manual or specifications. Access your computer’s display settings (Windows: Settings > System > Display; Mac: System Settings/Preferences > Displays) and select the projector to adjust its resolution.
Scaling is another important factor. If text or icons appear too small or too large on the projected image, you can adjust the scaling percentage in your display settings. This changes the size of elements on the screen without altering the resolution itself, making content more readable from a distance.
Display Orientation may need adjustment, especially if your projector is mounted on a ceiling and projects upside down, or if you’re using a vertical projection. Most projectors have an internal setting to flip or invert the image, and your computer’s display settings also offer orientation options to rotate the output.
Beyond these computer-side adjustments, Projector Calibration can significantly enhance image quality. This involves using the projector’s internal menu to tweak settings like brightness, contrast, color saturation, and sharpness. Adjust these in your viewing environment, considering factors like ambient light and screen surface, to get a balanced, vibrant picture.
“The key to a truly effective projected second monitor lies in meticulous calibration and matching its output to your environmental conditions,” says John Smith, Senior Projector Technician at Projectorcam.com. Ensuring settings like native resolution are correctly applied can transform a merely functional display into a high-quality, immersive experience.
Finally, managing Ambient Lighting is paramount. Even the brightest projectors struggle in direct sunlight. Dimming lights, closing curtains, or using blackout blinds can dramatically improve contrast and color vibrancy, making your projected second monitor much more usable.
Common Challenges and Troubleshooting
While setting up a projector as a second monitor is generally straightforward, you might occasionally encounter a few hurdles. Knowing how to diagnose and resolve these common issues can save you time and frustration.
One of the most frequent problems is “No Signal” appearing on the projector screen. This usually points to a connectivity issue.
- Check Cables: Ensure all cables (HDMI, VGA, USB-C) are securely plugged into both your computer and the projector. A loose connection is a common culprit.
- Correct Input Source: Verify that your projector is set to the correct input source. Most projectors have a “Source” or “Input” button on the remote or the unit itself; cycle through the options until your computer’s signal appears.
- Computer Output: Make sure your computer is actually sending a signal. For Windows, press
Windows key + Pand select “Extend.” For Mac, checkSystem Settings/Preferences > Displaysto ensure the projector is detected.
Incorrect Resolution or Blurry Image is another common complaint.
- Native Resolution: As discussed, always try to match your computer’s output resolution to the projector’s native resolution for optimal clarity. Scaling by the projector can lead to blurriness.
- Focus Ring: Many projectors have a manual focus ring on the lens. Adjust this to ensure the image is sharp on your projection surface.
- Cable Quality: A low-quality or excessively long cable can sometimes degrade the signal, especially for higher resolutions. Try a different, shorter, or higher-quality cable if issues persist.
If you experience Flickering or Intermittent Display, it could be due to:
- Cable Issues: Again, check for loose connections or faulty cables.
- Refresh Rate Mismatch: In rare cases, a refresh rate mismatch between your computer and projector can cause flickering. You can usually adjust the refresh rate in your advanced display settings on your computer.
- Driver Updates: Ensure your computer’s graphics drivers are up to date. Outdated drivers can lead to display inconsistencies.
Audio Issues (no sound or sound from the wrong device) often occur when connecting via HDMI.
- Output Device Selection: Your computer might still be routing audio through its internal speakers. Go to your computer’s sound settings (Windows:
Settings > System > Sound; Mac:System Settings/Preferences > Sound > Output) and explicitly select the projector or the correct audio output device.
Overheating can affect projector performance and lead to sudden shutdowns. Ensure your projector has adequate ventilation and that its air filters are clean. Refer to your projector’s manual for maintenance guidelines.
By systematically checking these points, you can resolve most issues and get your projector functioning smoothly as an extended display.
Conclusion
Transforming your projector into a second monitor is a game-changer for anyone seeking an expanded digital workspace, whether for professional productivity, immersive entertainment, or dynamic presentations. The ability to extend your desktop onto a massive screen offers unparalleled flexibility and a significantly enhanced viewing experience that traditional monitors simply cannot replicate.
With the right cables and a few simple adjustments in your operating system’s display settings, both Windows and Mac users can effortlessly set up their projectors for extended display mode. By paying attention to details like native resolution, proper scaling, and optimal ambient lighting, you can unlock the full potential of your projector, turning any wall into a vast, customizable digital canvas. Why limit your digital experience when you can project it on a grand scale? Have you considered how a projector as a second monitor could revolutionize your daily tasks?
Frequently Asked Questions
Can I use my projector wirelessly as a second monitor?
|
Our Picks for the Best projector in 2026
As an Amazon Associate I earn from qualifying purchases.
|
||
| Num | Product | Action |
|---|---|---|
| 1 | Epson Pro EX11000 3-Chip 3LCD Full HD 1080p Wireless Laser Projector, 4,600 Lumens Color/White Brightness, Miracast, 2 HDMI Ports, USB Power for Streaming, Built-in 16W Speaker |

|
| 2 | HAPPRUN Native 1080P Bluetooth Mini Projector, Full HD Portable Outdoor Movie Projector with Built-in Speaker, Compatible with Smartphone, HDMI, USB, AV, Fire Stick, PS5 for Home, Bedroom, Outdoor Use |
|
| 3 | 1500 ANSI Official Licensed Google TV Smart Projector, HAPPRUN 4K Full HD Home Theater with Auto Focus, Dolby Sound, Wi-Fi Bluetooth, Built-in Apps, Compatible with Phone & PC, Indoor & Outdoor Use |
|
| 4 | Epson Pro EX9270 Wireless 1080p 3LCD Projector 4,100 Lumens Color and White Brightness, Apple AirPlay, Miracast, Stream from Phone or Laptop, 2 HDMI Ports, 1.6x Optical Zoom, Built-In Speaker |
|
| 5 | [3500 ANSI/ Official Apps/65W Audio] Outdoor 4K Projector with WiFi and Bluetooth, Auto Focus, Auto Keystone Smart Projector Support DoIby Audio, 2026 Upgrade GO2 Short Throw Projector with 360°Stand |
|
| 6 | 【Official Licensed Google TV】4K Smart Projector with WiFi and Bluetooth, VOPLLS Outdoor Projectors with Dolby/Auto Focus, Portable Movie Phone Wireless Gaming Wifi Proyector for Bedroom/Home/Celling |
|
| 7 | Projector-4K with WiFi and Bluetooth:[3500 ANSI/60W Dolby Audio/Official Licensed Apps], Outdoor-Projector with Smart OS 2.0 & AI Auto Focus,ONOAYO ONO5Pro 2.0 Smart Movie Projector for Indoor/Outdoor |
|
| 8 | 【Officially-Licensed APP & Native 1080P】Thinnest 1.81\" Smart Mini Projector with WiFi and Bluetooth, Auto Focus & Keystone Portable Outdoor Projector, VOPLLS 4K Support Home Movie Projector |
|
| 9 | [Built-in Official Apps/4K Support] Smart Outdoor Projector with WiFi and Bluetooth, 800ANSI Movie Projector, DoIby Audio with Dual Speaker, Auto Focus w/ YouTube&PrimeVideo Proyector, Upgrad P62 Pro |
|
| 10 | Aurzen Roku TV Smart Projector with Wifi and Bluetooth, Roku Streaming Experience Built-in, 1080P FHD, DoIby Audio, Auto Focus & Keystone, Zoom, Movie Portable Outdoor Mini Projector, White |
|
Yes, some Windows 10/11 devices support Miracast for wireless display connections, allowing you to project to compatible devices without cables. For Mac, third-party solutions or Apple’s AirPlay with an Apple TV can provide wireless mirroring, though true extended display functionality wirelessly is more limited.
What kind of cable is best for connecting a projector as a second monitor?
HDMI is generally the best choice as it transmits both high-quality digital video and audio signals. If your computer or projector lacks HDMI, DisplayPort or USB-C (with an appropriate adapter) are excellent alternatives, offering superior quality over older VGA connections.
Does the projector’s resolution matter when used as a second monitor?
Absolutely. For the sharpest image, it’s crucial to match your computer’s output resolution to the projector’s native resolution. Projecting a non-native resolution forces the projector to scale the image, which can result in a blurry or less crisp display, impacting text readability and overall image quality.
Can I use a projector as a second monitor for gaming?
While possible, gaming on a projector as a second monitor has considerations. Input lag (delay between your action and its display) can be higher than on a dedicated gaming monitor. However, for casual gaming or cinematic experiences where immersion is key, the large screen size can be incredibly engaging, especially in a dark room.