A home theater setup can be a fantastic addition to any living space, offering an immersive viewing experience that rivals the cinema. However, the magic can quickly be broken by a tangled mess of projector cables, detracting from your room’s aesthetic and creating potential tripping hazards. If you’ve ever dreamt of a sleek, wire-free projection environment, you’re in the right place. This guide will walk you through a variety of effective methods, from simple DIY tricks to more advanced installations, ensuring your projector cables disappear seamlessly into your decor. We’ll explore solutions suitable for every skill level and budget, helping you achieve that perfectly polished look you desire.
Understanding the Need for Projector Cable Management
Projectors, whether ceiling-mounted or placed on a shelf, typically require several cables: power, HDMI for video, and potentially audio or control cables. These wires, when left exposed, can create a visual distraction, disrupt your room’s design, and even pose safety risks. Effective cable management isn’t just about aesthetics; it’s about safeguarding your equipment, preventing accidental damage, and creating a more organized and enjoyable viewing area.
The evolution of home entertainment has brought projectors from niche corporate tools to mainstream home cinema devices. Early projectors had fewer, thicker cables, but modern setups often involve multiple thin wires, making clutter even more prevalent. The goal of cable management is to bundle, conceal, or route these wires in a way that makes them virtually invisible, integrating your projector seamlessly into your living space.
Key Factors When Hiding Projector Cables
Before diving into specific solutions, consider a few critical factors that will influence your approach:
Projector Placement
|
Our Picks for the Best projector in 2026
As an Amazon Associate I earn from qualifying purchases.
|
||
| Num | Product | Action |
|---|---|---|
| 1 | Epson Pro EX9270 Wireless 1080p 3LCD Projector 4,100 Lumens Color and White Brightness, Apple AirPlay, Miracast, Stream from Phone or Laptop, 2 HDMI Ports, 1.6x Optical Zoom, Built-In Speaker |

|
| 2 | 【Official Licensed Google TV】4K Smart Projector with WiFi and Bluetooth, VOPLLS Outdoor Projectors with Dolby/Auto Focus, Portable Movie Phone Wireless Gaming Wifi Proyector for Bedroom/Home/Celling |
|
| 3 | Epson Pro EX11000 3-Chip 3LCD Full HD 1080p Wireless Laser Projector, 4,600 Lumens Color/White Brightness, Miracast, 2 HDMI Ports, USB Power for Streaming, Built-in 16W Speaker |
|
| 4 | Aurzen Roku TV Smart Projector with Wifi and Bluetooth, Roku Streaming Experience Built-in, 1080P FHD, DoIby Audio, Auto Focus & Keystone, Zoom, Movie Portable Outdoor Mini Projector, White |
|
| 5 | [Built-in Official Apps/4K Support] Smart Outdoor Projector with WiFi and Bluetooth, 800ANSI Movie Projector, DoIby Audio with Dual Speaker, Auto Focus w/ YouTube&PrimeVideo Proyector, Upgrad P62 Pro |
|
| 6 | [3500 ANSI/ Official Apps/65W Audio] Outdoor 4K Projector with WiFi and Bluetooth, Auto Focus, Auto Keystone Smart Projector Support DoIby Audio, 2026 Upgrade GO2 Short Throw Projector with 360°Stand |
|
| 7 | 1500 ANSI Official Licensed Google TV Smart Projector, HAPPRUN 4K Full HD Home Theater with Auto Focus, Dolby Sound, Wi-Fi Bluetooth, Built-in Apps, Compatible with Phone & PC, Indoor & Outdoor Use |
|
| 8 | 【Officially-Licensed APP & Native 1080P】Thinnest 1.81\" Smart Mini Projector with WiFi and Bluetooth, Auto Focus & Keystone Portable Outdoor Projector, VOPLLS 4K Support Home Movie Projector |
|
| 9 | HAPPRUN Native 1080P Bluetooth Mini Projector, Full HD Portable Outdoor Movie Projector with Built-in Speaker, Compatible with Smartphone, HDMI, USB, AV, Fire Stick, PS5 for Home, Bedroom, Outdoor Use |
|
| 10 | Projector-4K with WiFi and Bluetooth:[3500 ANSI/60W Dolby Audio/Official Licensed Apps], Outdoor-Projector with Smart OS 2.0 & AI Auto Focus,ONOAYO ONO5Pro 2.0 Smart Movie Projector for Indoor/Outdoor |
|
Where is your projector located? Is it ceiling-mounted, wall-mounted, or sitting on a media console? The location dictates the cable path and the most suitable concealment methods. Ceiling-mounted projectors often require routing cables across the ceiling and down walls, while shelf-based projectors might only need shorter, localized solutions.
Room Structure and Aesthetics
What kind of walls and ceilings do you have? Drywall allows for in-wall concealment, while brick or concrete might necessitate surface-mounted options. Consider your room’s existing decor and choose solutions that blend in, such as paintable cable raceways or decorative elements.
Cable Length and Type
Assess the length of your cables. Excessively long cables add to clutter and can degrade signal quality. Opt for cables that are just long enough for your needs. Also, differentiate between power cables and signal cables; it’s often best to route them separately to minimize interference.
DIY vs. Professional Installation
Are you comfortable with DIY projects, including drilling into walls or ceilings? Or would you prefer a simpler, less invasive approach, or even hire a professional? In-wall wiring typically requires more skill and tools than surface-mounted solutions.
Future Accessibility and Flexibility
Consider if you’ll need to access or change your cables in the future. Some solutions, like in-wall wiring, are more permanent, while others, like cable sleeves or raceways, offer easier access for upgrades or troubleshooting.
Practical Methods for Hiding Projector Cables
Let’s explore the most effective ways to hide your projector cables, categorized for clarity.
1. In-Wall/In-Ceiling Cable Concealment
For the cleanest, most professional look, running cables inside your walls or ceiling is the ultimate solution. This method makes cables virtually disappear, as they are entirely hidden from view.
- How it Works: This involves carefully cutting small access holes in your drywall near the projector and at the ceiling or floor level where your components are located. Cables are then “fished” through the wall cavity using a fish tape. Specialized in-wall cable management kits often include conduits and low-voltage wall plates, simplifying the process and ensuring safety. For ceiling-mounted projectors, this means routing cables through the ceiling joists to a wall, then down to your media console.
- Pros:
- Invisible: Achieves a completely wireless look.
- Safe: Cables are protected from damage and are not a tripping hazard.
- Professional: Ideal for dedicated home theaters.
- Cons:
- Complex: Requires some DIY skill, tools (drill, drywall saw, fish tape), and confidence.
- Invasive: Involves cutting into walls/ceilings, which may require patching and painting afterward.
- Less Flexible: Harder to change or upgrade cables once installed.
- Best For: New constructions, major renovations, or homeowners comfortable with advanced DIY projects. If you have access to an attic or crawl space, this process becomes significantly easier.
“For the truly invisible setup, in-wall routing is unmatched. It’s an investment in time and effort, but the clean aesthetic is worth it for many home theater enthusiasts.” – Jane Doe, Home AV Integrator
2. Surface-Mounted Cable Raceways and Concealers
If cutting into walls isn’t an option or you prefer a less invasive solution, surface-mounted cable raceways (also known as cable tunnels or channels) are an excellent alternative.
- How it Works: These are plastic or metal channels that adhere directly to your wall or ceiling, encasing the cables. They come in various sizes and shapes and can often be painted to match your wall color, helping them blend in seamlessly with your decor. You simply open the channel, lay your cables inside, and then snap it shut.
- Pros:
- Easy to Install: No major construction or specialized tools required.
- Paintable: Can be painted to match your wall or ceiling for a discreet look.
- Accessible: Easier to add, remove, or change cables compared to in-wall solutions.
- Protective: Shields cables from physical damage.
- Cons:
- Visible: While paintable, they are still a physical addition to your wall or ceiling.
- Aesthetics: Can look bulky if not chosen or installed carefully.
- Best For: Renters, those seeking a simpler DIY solution, or rooms where in-wall wiring is not feasible. They are particularly effective for routing cables along ceiling edges or skirting boards.
3. Utilizing Architectural Features
Cleverly integrating cables with your room’s existing architectural elements can provide a naturally hidden pathway.
- How it Works:
- Crown Molding and Baseboards: Many types of crown molding and baseboards have a natural gap behind them where cables can be tucked away. If not, some decorative molding is designed with channels specifically for wires. You can run cables along the top of the wall and secure them behind existing crown molding, or along the floor behind baseboards.
- Window Frames and Doorways: For projectors near windows, cables can be run discreetly along the window frame or tucked behind curtains or blinds. Similarly, door frames can offer a natural channel for vertical cable runs.
- Conduits and Coves: If your room features decorative coves or conduits, these can often be utilized to hide cables without extensive modification.
- Pros:
- Blends Seamlessly: Uses existing features for a natural, integrated look.
- Less Invasive: Often requires minimal alteration to the room.
- Cost-Effective: Utilizes what you already have.
- Cons:
- Limited Application: Only works if your room has suitable architectural features in the right places.
- Capacity: May not accommodate many cables or very thick ones.
- Best For: Rooms with traditional decor or existing architectural details that can be leveraged.
4. Cable Sleeves and Wraps
For bundling multiple cables together, especially shorter runs near the projector or your AV equipment, cable sleeves and wraps are simple yet effective.
- How it Works: These are flexible tubes, often made of neoprene, fabric, or spiral plastic, that zip up or wrap around multiple cables, consolidating them into a single, neat bundle. This reduces visual clutter and makes the overall appearance much tidier.
- Pros:
- Easy to Use: Quick and straightforward installation.
- Flexible: Allows cables to move and flex if needed.
- Bundles Neatly: Transforms a messy tangle into a single, organized line.
- Cons:
- Still Visible: While tidier, the bundle of cables is still exposed.
- Limited Concealment: Best for short runs or behind furniture, not for across-room solutions.
- Best For: Managing cables directly at the projector, behind media consoles, or where flexibility is required.
5. Adhesive Cable Clips and Clamps
For securing cables along a discreet path, adhesive cable clips or screw-in clamps are invaluable.
- How it Works: These small clips stick to walls, ceilings, or furniture and hold cables securely in place, guiding them along desired routes. They prevent cables from dangling or spreading out, creating a more organized look.
- Pros:
- Inexpensive: Very affordable solution.
- Easy to Install: Simply peel and stick (for adhesive types) or screw in.
- Versatile: Can be used on various surfaces and for different cable paths.
- Cons:
- Partial Concealment: Cables are still visible, just neatly aligned.
- Adhesive Longevity: Adhesive might wear out over time.
- Surface Damage: Screw-in clamps create holes; strong adhesive might damage paint upon removal.
- Best For: Guiding cables along corners, furniture legs, or discreetly along the underside of shelves.
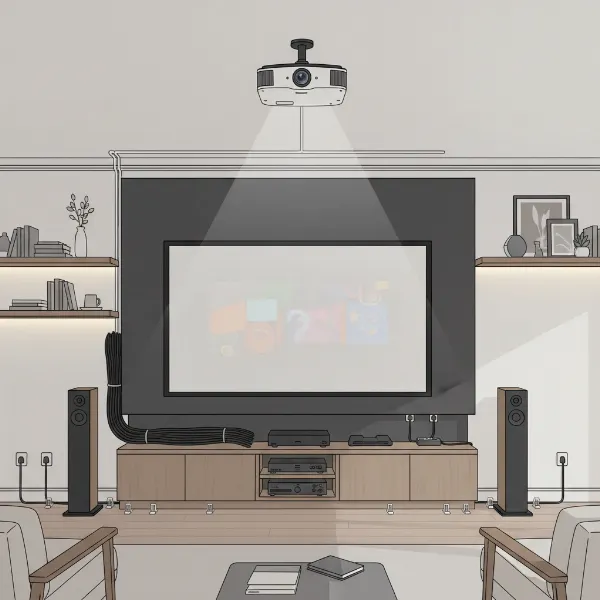 Various cable management solutions for projectors, including raceways, sleeves, and clips, illustrating a clean setup.
6. Strategic Furniture and Decor Placement
Sometimes, the simplest solution is to use your existing room layout to your advantage.
- How it Works: Position furniture like bookcases, media consoles, or tall plants strategically to block the view of cable runs. A well-placed bookshelf can hide a vertical cable run from ceiling to floor, while a media console can conceal cables connecting to your projector’s source devices.
- Pros:
- No Installation Required: Uses existing items, no drilling or sticking.
- Flexible: Easy to reconfigure if you rearrange your room.
- Aesthetic Integration: Blends cable management with your interior design.
- Cons:
- Limited Scope: Best for shorter runs or specific areas, not whole-room solutions.
- Still Present: Cables are hidden, not truly gone.
- Best For: Small spaces, temporary setups, or when you want quick, non-invasive concealment.
7. Going Wireless
While not a complete cable elimination, wireless technology can significantly reduce the number of visible cables.
- How it Works: Wireless HDMI transmitters can send video and audio signals from your source device to your projector without a physical HDMI cable. Similarly, Bluetooth audio devices can eliminate separate audio cables.
- Pros:
- Reduces Cable Clutter: Eliminates long runs of HDMI or audio cables.
- Convenient: Offers flexibility in placing source devices.
- Cons:
- Cost: Wireless transmitters can be an additional investment.
- Still Requires Power: The projector itself will still need a power cable.
- Potential Interference: Wireless signals can sometimes experience lag or interference.
- Best For: Reducing cable runs for video and audio, especially in complex setups or when drilling is impossible.
8. Flat Adhesive Cables
An innovative and subtle option, flat adhesive cables offer a nearly invisible power solution.
- How it Works: These ultra-thin power cords can be adhered directly to your wall and then painted over, making them virtually disappear beneath the paint or wallpaper.
- Pros:
- Highly Discreet: Can become almost invisible once painted.
- Non-Invasive: No need to cut into walls.
- Cons:
- Primarily for Power: Limited to certain cable types.
- Installation Effort: Requires careful application and painting.
- Less Flexible: Not easily moved once installed and painted.
- Best For: Hiding power cables in a very discreet manner, particularly on flat wall surfaces.
Pro Tips for Projector Cable Management
- Plan Your Layout: Before you start, map out your projector’s location, the path of your cables, and where they will connect to your AV equipment. This planning will save you time and effort.
- Measure Twice, Cut Once: Ensure your cables are the appropriate length. Excess slack leads to tangles and loops. For in-wall installations, measure carefully to ensure your access holes are in the right spots.
- Bundle and Secure: Use zip ties, Velcro straps, or cable sleeves to bundle multiple cables together. This creates a cleaner, more organized look and prevents individual wires from dangling.
- Separate Power and Signal: Whenever possible, route power cables separately from audio and video cables to minimize electromagnetic interference, which can degrade signal quality.
- Test Connections: Before finalizing any permanent concealment, test all your connections to ensure everything is working correctly.
- Safety First: When working with electrical wiring or cutting into walls, always prioritize safety. If unsure, consult a professional electrician or installer. Ensure you use in-wall rated cables for any concealed runs.
- Paint to Match: For surface-mounted raceways or flat adhesive cables, painting them to match your wall or ceiling color is crucial for achieving a truly integrated look.
Conclusion
Taming the spaghetti monster of projector cables might seem like a daunting task, but with the right approach, it’s entirely achievable. From the invisible elegance of in-wall wiring to the simplicity of cable raceways and clever use of decor, there’s a solution for every home and every budget. By carefully planning your setup and choosing the methods that best suit your needs, you can transform your home theater from a cluttered space into a sleek, professional, and inviting environment.
Which method will you try first to achieve a truly clean look for your projector setup? The journey to a wire-free viewing experience starts now!
Frequently Asked Questions
What are cable raceways, and how do they work for projectors?
Cable raceways are channels, typically made of plastic or metal, that you mount to your wall or ceiling. You open them, place your projector cables inside, and then close them. Many are paintable, allowing them to blend with your wall color, providing an easy and effective way to hide cables without cutting into drywall.
Can I run projector power cables inside the wall?
Yes, you can run projector power cables inside the wall, but it’s crucial to use in-wall rated cables and follow local electrical codes. It’s often recommended to use a specialized in-wall power extension kit or consult with a licensed electrician to ensure safety and compliance.
How can I hide projector cables if my projector is ceiling-mounted?
For ceiling-mounted projectors, common methods include running cables through the ceiling cavity to a wall and then down to your AV equipment, using paintable surface-mounted cable raceways along the ceiling and wall, or utilizing architectural features like crown molding to conceal the wires.
Are wireless HDMI transmitters a good way to hide projector cables?
Wireless HDMI transmitters are an excellent solution for reducing cable clutter, as they eliminate the need for a long HDMI cable run between your source device and the projector. However, your projector will still require a power cable, so it’s a partial but significant cable reduction strategy.
What are some budget-friendly ways to hide projector cables?
Budget-friendly options include using adhesive cable clips to neatly route cables along walls or furniture, bundling cables with inexpensive zip ties or Velcro straps, and strategically placing furniture or decorative items to block the view of exposed wires. Paintable cable raceways are also a cost-effective choice.